Ingredients
To achieve perfection, we need to balance the brine (for moisture) with the breading (for crunch). Here is what you will need:
The Chicken:
-
1.5 lbs (approx. 680g) chicken tenders (or boneless, skinless chicken breasts sliced into 1-inch strips)
-
1 teaspoon kosher salt
-
½ teaspoon black pepper
-
½ teaspoon garlic powder
-
½ teaspoon smoked paprika
The Breading Station:
-
½ cup all-purpose flour
-
2 large eggs
-
1 tablespoon water
-
1 ½ cups Panko breadcrumbs (Japanese-style breadcrumbs are key for maximum crunch)
-
½ cup grated Parmesan cheese (optional, but adds incredible flavor)
-
1 teaspoon onion powder
-
½ teaspoon dried oregano
-
½ teaspoon cayenne pepper (optional, for heat)
-
Non-stick spray: Avocado oil or olive oil spray (Do not use cooking spray like PAM; it damages the air fryer coating).
Optional Dipping Sauces:
-
Honey Mustard
-
Ranch
-
BBQ Sauce
-
Buffalo Sauce
Equipment
-
Air Fryer (Standard 4–6 quart size works best; cook in batches if yours is smaller)
-
Three shallow bowls (for the breading station)
-
Tongs
-
Meat thermometer (recommended)
Instructions
Phase 1: Preparation (Time: 10 Minutes | Intensity: Low)
1. Prepare the Chicken:
Start by patting your chicken tenders dry with a paper towel. This is a crucial step. If the chicken is wet, the breading will slide off. If you are using whole chicken breasts, slice them into uniform 1-inch strips to ensure even cooking.
Season the chicken directly with the kosher salt, black pepper, garlic powder, and smoked paprika. Let them sit at room temperature while you prepare the breading station. This allows the salt to penetrate the meat slightly, ensuring a flavorful interior.
2. Set Up the Breading Station:
You will need three shallow bowls or plates. This is the “Standard Breading Procedure” (SBP), which ensures the coating sticks perfectly.
-
Bowl 1 (The Dry Base): Add the all-purpose flour.
-
Bowl 2 (The Binder): Whisk the two eggs with one tablespoon of water until frothy.
-
Bowl 3 (The Crunch): Combine the Panko breadcrumbs, grated Parmesan cheese, onion powder, dried oregano, and cayenne pepper (if using). Mix well.
Phase 2: The Breading Process (Time: 10 Minutes | Intensity: Moderate)
3. Dredge and Coat:
Working with one chicken tender at a time, follow this sequence:
-
Flour: Coat the chicken in flour, shaking off any excess. This dries the surface and helps the egg adhere.
-
Egg: Dip the floured chicken into the egg wash, ensuring it is fully coated.
-
Panko: Press the chicken firmly into the Panko mixture. Use your fingers to press the crumbs onto the chicken. Do not just roll it; press it. This pressure is what prevents the crust from falling off during the air frying process.
4. The “Double Dip” Secret (Optional):
For the absolute crispiest tenders (similar to double-fried Korean chicken or high-end sports bars), you can double-dip. After coating in Panko, dip the tender back into the egg wash, then back into the Panko. This creates a thicker armor that stays crunchy even when tossed in sauce.
5. Pre-heat the Air Fryer:
Preheat your air fryer to 400°F (200°C) for 3 minutes. Preheating is non-negotiable in an air fryer. Putting food into a cold air fryer results in soggy breading and uneven cooking.
6. Prepare the Basket:
Lightly spray the air fryer basket with your oil spray. This prevents sticking. Do not use aerosol cooking sprays (like PAM) as they contain lecithin which can strip the non-stick coating off your air fryer over time. Use a pump sprayer filled with avocado or olive oil.
Phase 3: The Cook (Time: 12–15 Minutes | Intensity: Low)
7. Arranging the Tenders:
Place the breaded tenders in the air fryer basket in a single layer. Do not overcrowd. The air needs to circulate around the chicken to make it crispy. If the pieces are touching, they will steam rather than fry. Depending on the size of your air fryer, you will likely need to cook in two batches.
8. The First Spray:
Lightly spray the tops of the chicken tenders with oil. This helps the Panko turn golden brown rather than remaining white and powdery.
9. Cooking Instructions:
-
Setting: Air Fry
-
Temperature: 400°F (200°C)
-
Time: 6 Minutes
10. The Flip:
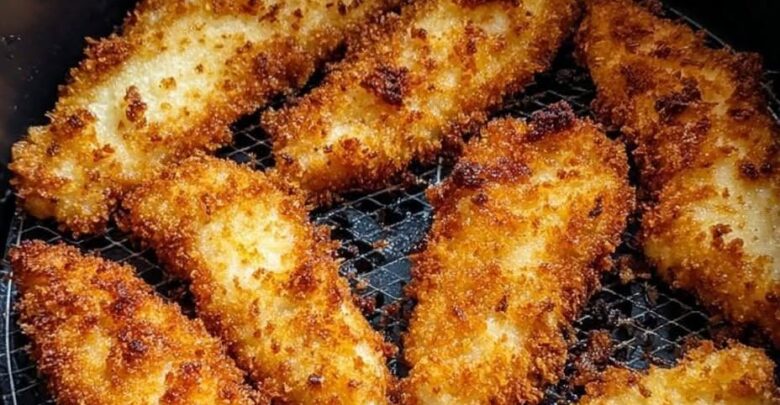
After 6 minutes, pull the basket out. Using tongs, flip each tender over. You should see a beautiful golden crust forming on the bottom. Spray the new top side lightly with oil.
11. The Finish:
Return the basket to the air fryer and cook for an additional 5 to 8 minutes. The total cook time will depend on the thickness of your tenders.
-
Thin tenders: Check at 5 minutes.
-
Thick tenders: Check at 7–8 minutes.
12. The Temperature Check:
The USDA recommends chicken be cooked to an internal temperature of 165°F (74°C) . Insert your meat thermometer into the thickest part of the largest tender. If it reads 165°F, they are done.
Phase 4: Rest and Serve (Time: 5 Minutes | Intensity: Low)
13. Resting:
Remove the tenders from the air fryer and let them rest on a wire rack (not a plate) for 3–5 minutes. If you put them on a plate immediately, the steam from the hot chicken will make the bottom soggy. A wire rack allows the steam to escape, keeping the crust crispy.
14. Serving:
Serve immediately with your favorite dipping sauces. These are best enjoyed fresh, but they do reheat well in the air fryer (never the microwave).
Nutritional Information
Disclaimer: Nutritional values are estimates and will vary based on the specific brands of ingredients used and the size of the chicken tenders.
Per Serving (Assuming 3 Tenders per serving):
-
Calories: 380 kcal
-
Total Fat: 12g
-
Saturated Fat: 3.5g
-
Trans Fat: 0g
-
Cholesterol: 165mg
-
Sodium: 680mg
-
Total Carbohydrates: 28g
-
Dietary Fiber: 1.5g
-
Total Sugars: 1g
-
Protein: 38g